Notes & writing
Images
Paste, drop or link images, and draw on them: arrows, text, numbered steps, blur, crop. Encrypted on your device before upload; size limits per plan.
Images in notes are encrypted on your device before they are uploaded, just like the notes. Our storage only ever holds scrambled bytes.
Add an image
- Paste a screenshot or a copied image into the Editor.
- Drop an image file onto the Editor.
- Choose a file: ⌘KCtrlK → “Insert image…”.
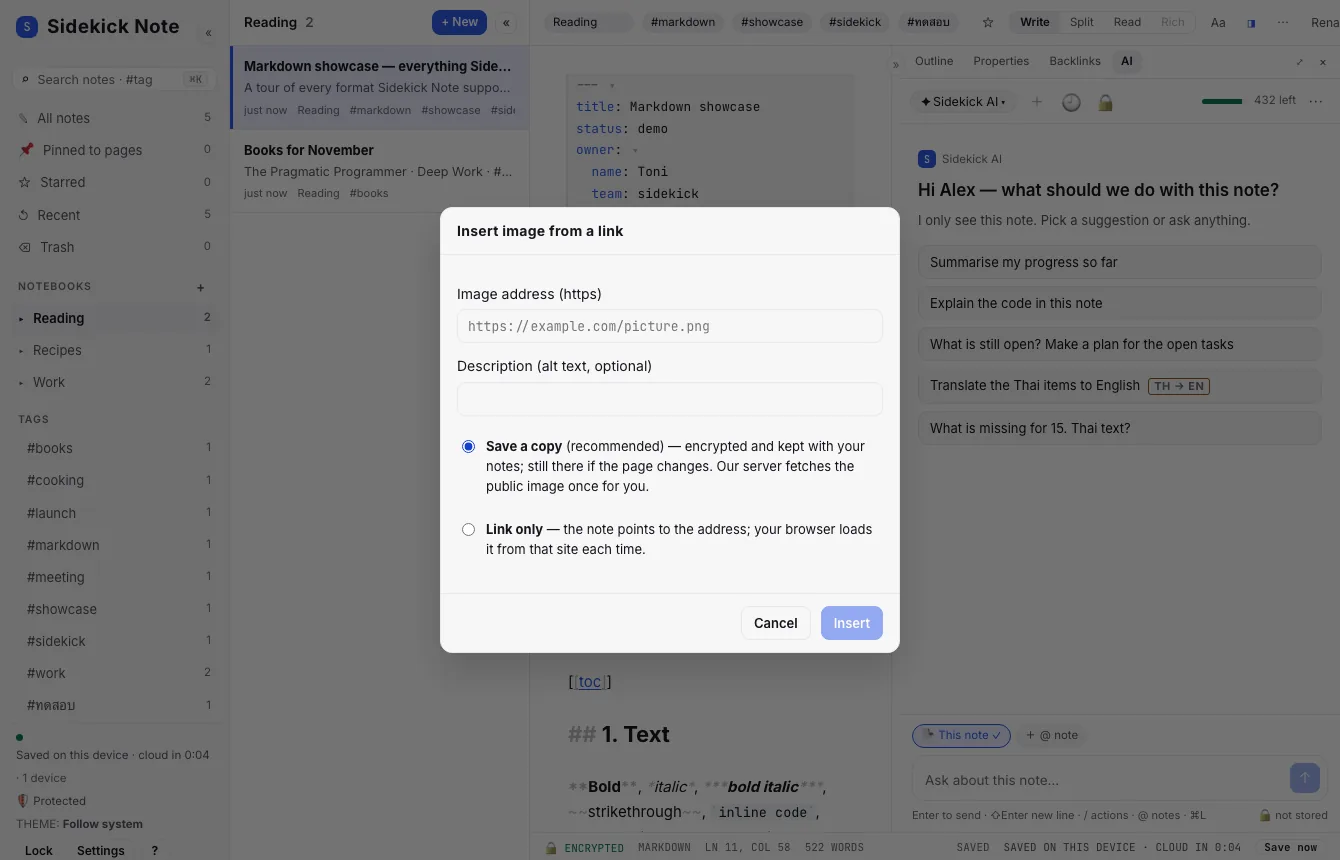
- From a link: ⌘KCtrlK → “Insert image from a link…”, then pick:
- Save a copy — we fetch the image once, it is encrypted and stored with your note (it keeps working if the site removes it).
- Link only — a normal Markdown image
; your browser loads it from that site each time.
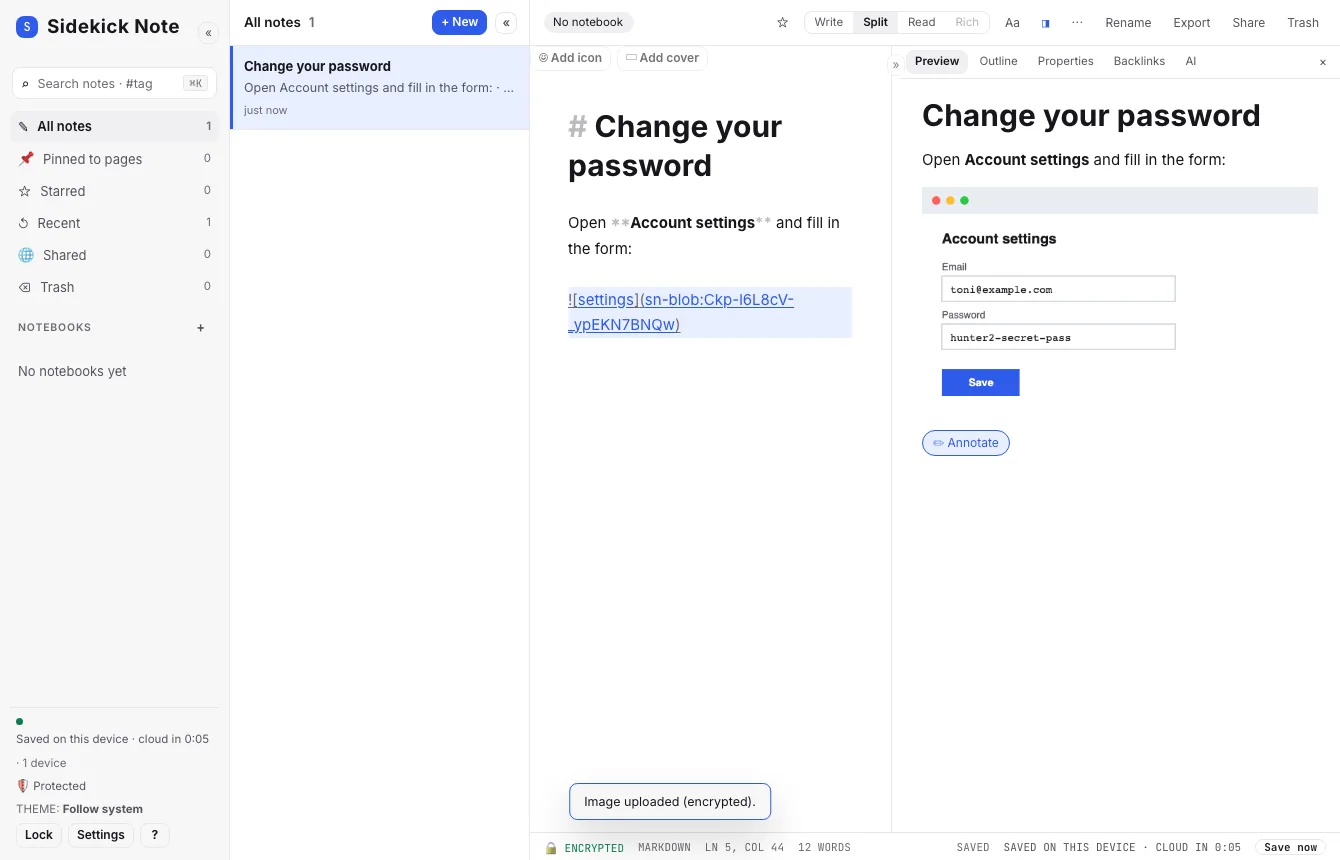
In the note an encrypted image looks like . Write a short alt text — it helps screen readers and search.
Annotate a picture
Draw on a picture in your note: circle a button, point an arrow at it, number the steps, hide a password. Open the Annotator in any of three ways:
- In Split or Read, point at the picture and press ✏ Annotate (on a touch screen the button is always there).
- Press ⌘KCtrlK, type “annotate” and pick Annotate image… (if the note has several pictures, you pick one).
The Markup bar has these tools. The tool stays selected after you draw, so you can add several marks in a row.
| Tool | Key | What it does |
|---|---|---|
| ↖ Select | V | Click a mark to select it, drag to move it, Delete removes it. |
| ✎ Pen · ▬ Highlighter | P · H | Freehand line; the highlighter is see-through. |
| / Line · ➚ Arrow · ▭ Rectangle · ◯ Ellipse | L · A · R · O | Hold ⇧Shift for a straight (45°) line or arrow, a square or a circle. |
| T Text | T | Click, type (Thai works), press ↵Enter. Double-click text to change it. |
| 💬 Callout | K | A rounded box with your text and a pointer you aim. |
| ① Badge | N | Numbered circles that count up by themselves: 1, 2, 3 … for “do this, then this”. |
| ▦ Blur | B | Drag over something private. It is turned into big blocks that cannot be read back. |
| ⛶ Crop · ⟳ Rotate | C | Drag the part to keep and press Crop; Rotate turns the picture a quarter. |
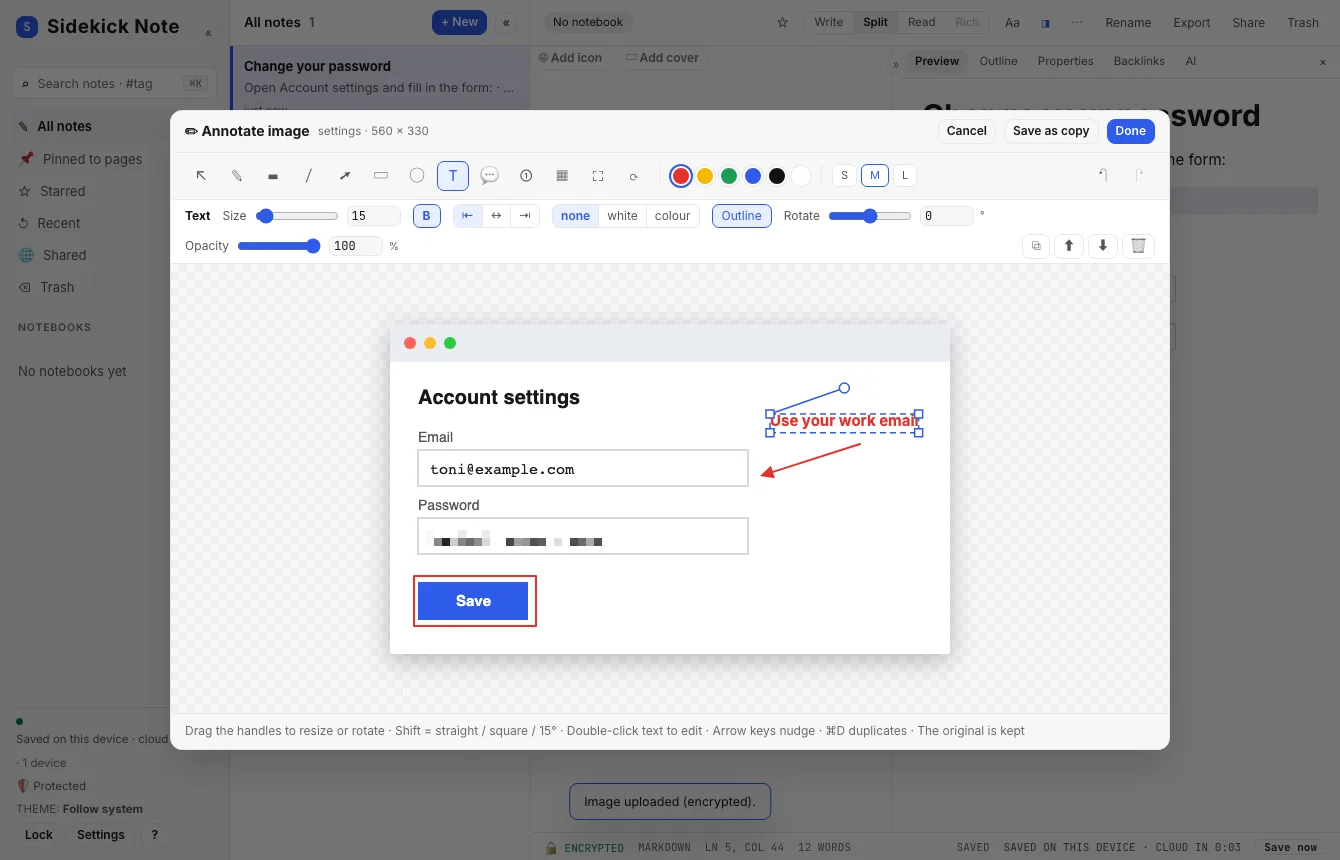
Undo and redo are ⌘ZCtrlZ and ⌘⇧ZCtrlShiftZ. Colours (six) and sizes (S, M, L) sit on the same bar. The picture is shown to fit, but it is saved at its full size. To change a mark after drawing it, see Resize, rotate and style a mark.
Resize, rotate and style a mark
Every mark you draw stays selected, with handles, until you click somewhere else. You can change it as often as you like before you press Done.
- Resize — drag a corner or an edge handle. Hold ⇧Shift to keep the proportions. On a text the corners change the font size, so a text that is too small or too big is one drag away. A badge grows the same way.
- Rotate — drag the round handle above the mark. Hold ⇧Shift to snap to 15°. Text, boxes, ellipses and callouts can be turned; blur and badges stay upright so blur is always a real redaction.
- Arrows and lines — drag either end to re-aim or change the length. Drag the yellow middle handle to bend the arrow into a curve; drag it back to the middle to straighten it.
- Move — drag the mark itself, or nudge it with the arrow keys (⇧Shift = 10 pixels). ⌘DCtrlD duplicates it, ] and [ bring it forward or send it back.
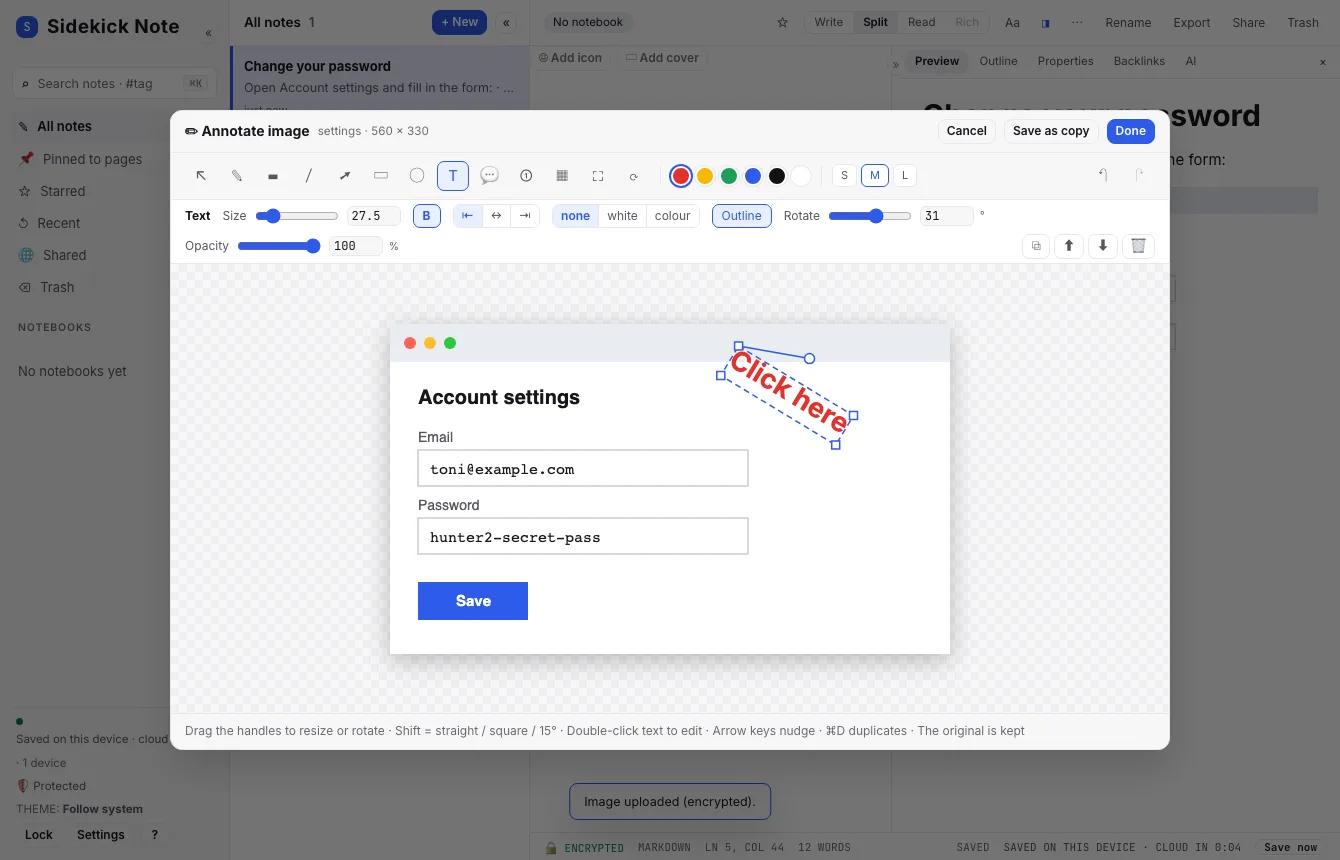
The Properties bar under the Markup bar changes the selected mark: thickness (slider or number), fill (none, see-through, solid), corner roundness, text size, bold, alignment and background, rotation in degrees, opacity, and the buttons Duplicate, Bring forward, Send back and Delete. The colour and S / M / L buttons on the Markup bar change the selected mark too. Dragging a slider is one undo step, and the Annotator remembers your last colour, size, arrowhead and styles on this device.
Arrows: heads, size and lines
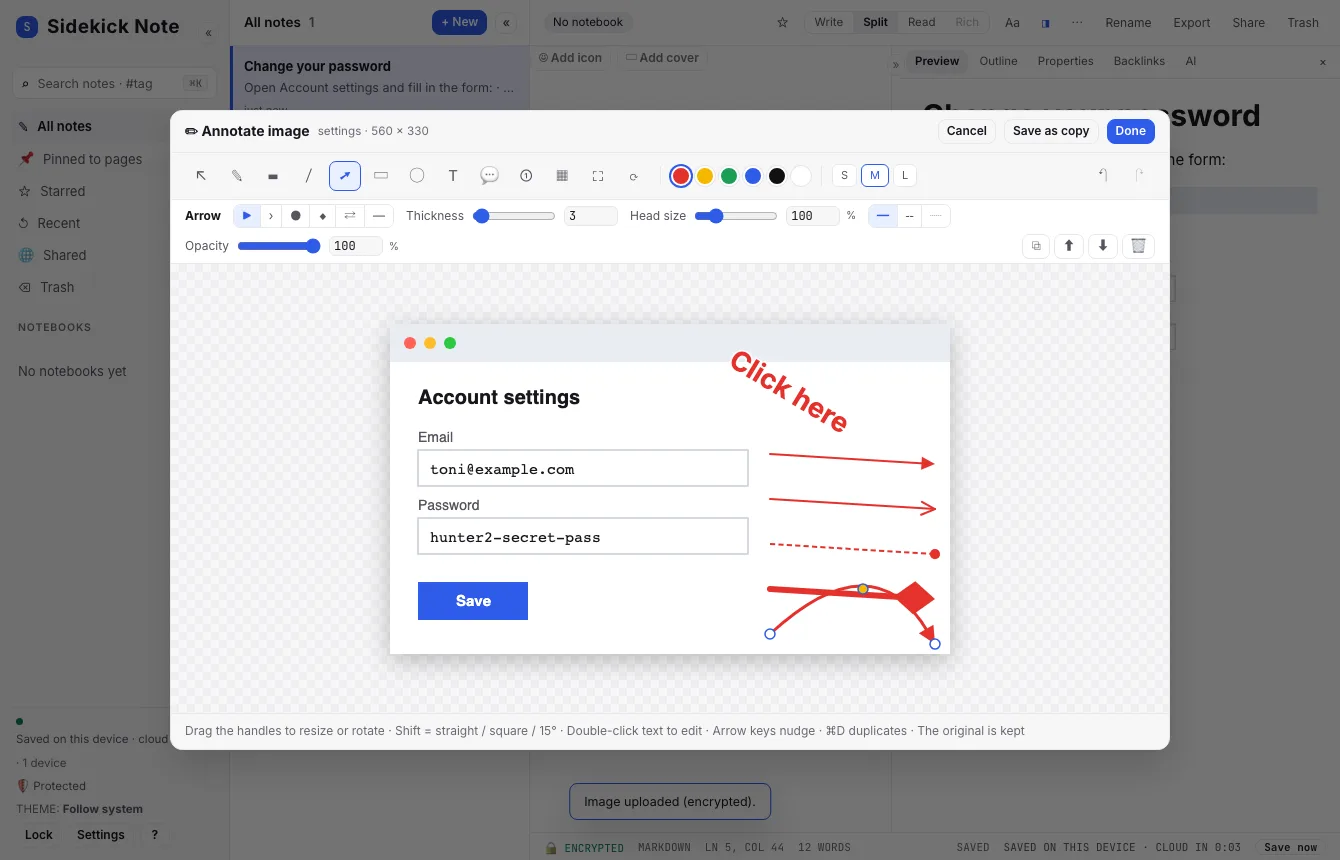
- Head — filled triangle, open V, dot, diamond, a head at both ends, or none (a plain Line; the / Line tool draws one directly).
- Thickness and Head size are separate: a thin line can have a big head (50 – 300 %), and a thick line a small one.
- Line style — solid, dashed or dotted.
The 💬 Callout tool (K) makes a rounded box with your text and a pointer: click, type, press ↵Enter, then drag the yellow dot to aim the pointer. Its fill can be paper (white), colour or none. Rectangles and callouts have a Corner slider for rounded corners, and badges come as a circle, a square or a pin.
Done, Save as copy or Cancel
- Done (⌘↵CtrlEnter) — the picture in your note is replaced by the marked-up one. It is encrypted and uploaded like any picture. Your original stays stored and is not shown; ↩ Revert to original brings it back (see below).
- Save as copy — the marked-up picture is added below the original; the original stays where it is.
- Cancel (Esc) — nothing changes. If you drew something, you are asked before it is thrown away.
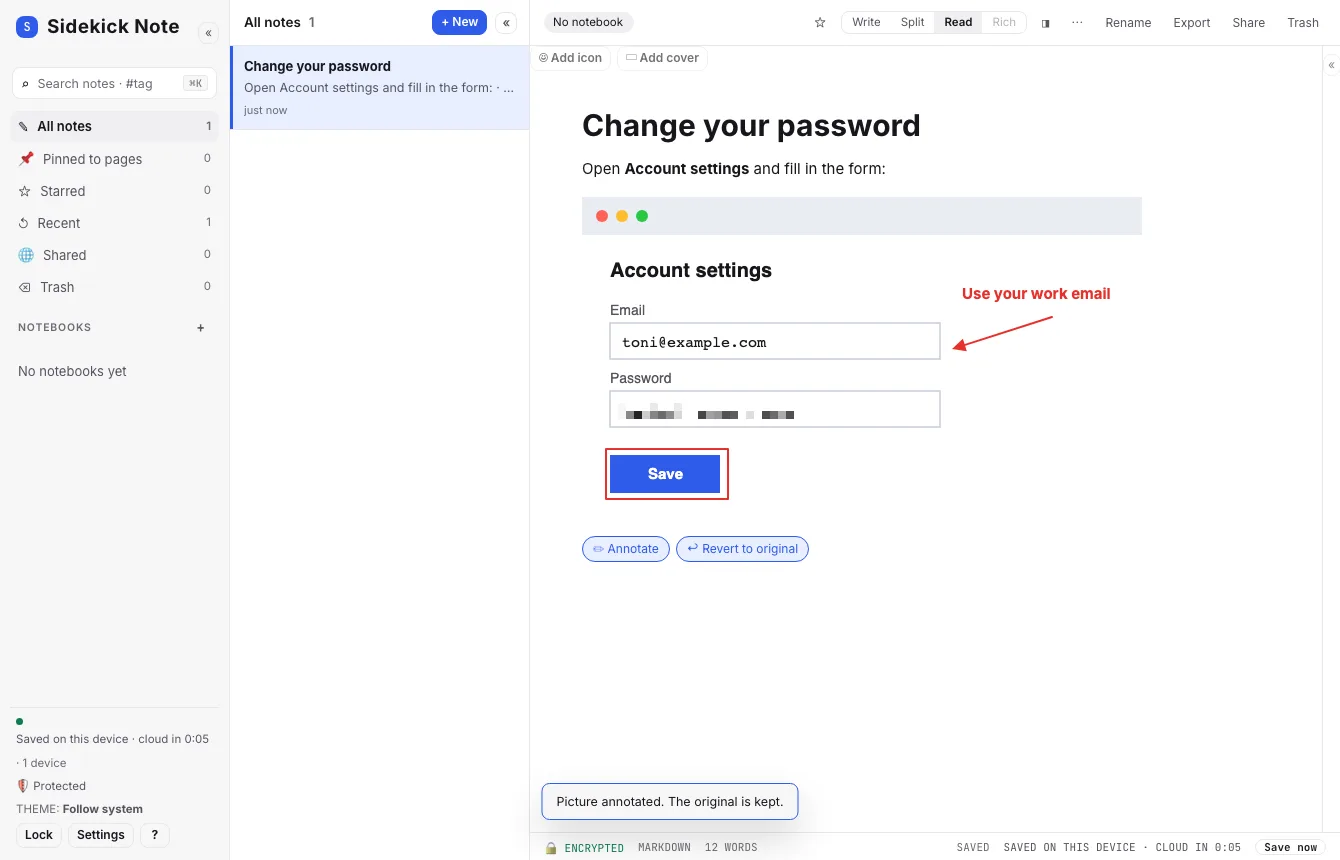
Revert to the original
A picture you marked up with Done shows ↩ Revert to original next to ✏ Annotate (or press ⌘KCtrlK → Revert image to original…). Confirm, and the first picture comes back. Annotating the same picture again keeps that first original, so Revert always goes back to the start. The marked-up picture is taken out of the note; to keep both, use Save as copy instead of Done.
In the note’s text, a marked-up picture is followed by a small hidden comment like <!--sn-orig:…-->. It is how Sidekick Note remembers the original on all your devices; leave it there. The original is stored like any other picture, so it counts toward your storage.
The same ✏ Annotate and ↩ Revert buttons are in the Chrome extension’s Side panel, in Read (Chrome extension).
Very large pictures (over about 24 megapixels) are saved a little smaller, and the Annotator tells you. Animated GIFs cannot be annotated, because only their first frame would be kept. Everything happens in your browser, on the decrypted picture; nothing is sent to our server except the new encrypted picture.
How images are protected
- The image is sealed (AES-256-GCM) in your browser, kept on this device, then uploaded in the background. Only your devices can open it.
- An image in a private notebook is sealed with that notebook’s key.
- Offline? The image stays on the device and uploads when you are back online, on Save now or at the next start.
Size limits
| Plan | Largest image |
|---|---|
| Free · Plus | 10 MB |
| Pro · VIP | 25 MB |
PNG, JPEG, GIF, WebP and AVIF work. SVG files are not accepted (they can carry scripts).
Images and AI
The 🖼 Image chip in the AI chat and the image actions (alt text, image → Markdown) appear only when the chosen AI model can read images. An image is sent to the AI only when you add it to a message. See AI: menu, chat and privacy.
Export and share
An .html export embeds the images; a .zip has them as files next to the notes. A share link leaves images out (Sharing a note).
Was this helpful?
Thanks! We keep no record of your answer — if something was missing, tell us below.
Something missing or wrong? Write to support@plaazaa.com.